
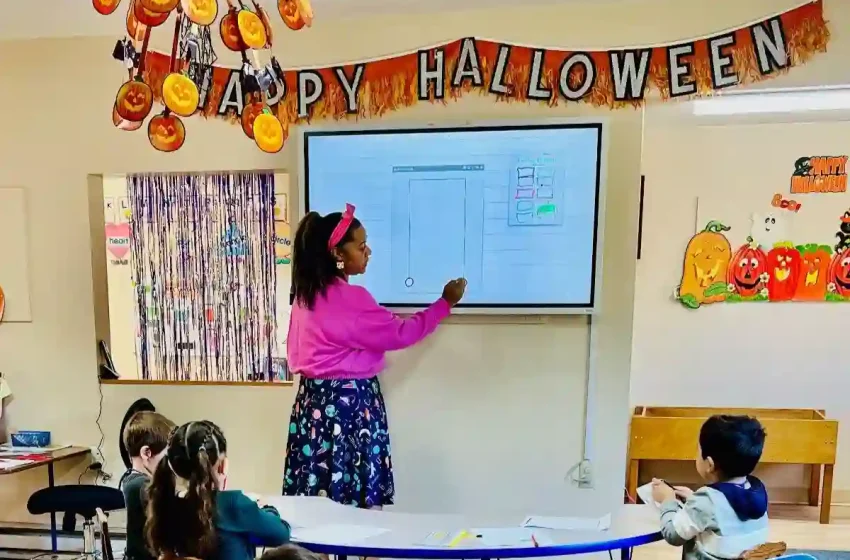
24 Halloween Whiteboard Ideas for Teachers
Halloween is a wonderful opportunity to make the classroom feel more creative, welcoming, and festive. One of the easiest ways to decorate for the season is with a Halloween-themed whiteboard. You don’t need professional drawing skills or expensive decorations—just a few dry-erase markers and some simple shapes.
These 24 Halloween Whiteboard Ideas for Teachers include pumpkins, ghosts, bats, spiders, witch hats, haunted houses, monsters, candy, Halloween countdowns, and interactive classroom designs. Each idea includes simple step-by-step instructions so teachers can recreate the artwork quickly.
You can use these designs as morning-board decorations, classroom announcements, Halloween activity prompts, drawing activities, or simply as seasonal artwork. They can also be adapted for elementary classrooms, middle school rooms, libraries, tutoring spaces, and homeschool environments.
For most ideas, black, orange, purple, green, red, and white markers are enough to create a fun Halloween look.
1. Classic Jack-O’-Lantern
A pumpkin is one of the easiest Halloween drawings to start with.
What You’ll Need
- Orange dry-erase marker
- Black marker
- Green marker
Step-by-Step
- Draw a large oval or slightly irregular pumpkin shape.
- Add curved lines from the top to the bottom.
- Draw a small stem at the top.
- Add two triangular eyes.
- Draw a small triangular nose.
- Create a wide smiling mouth.
- Add a green leaf beside the stem.
- Add a few tiny stars around the pumpkin.
2. Friendly Classroom Ghost
A cute ghost can make the classroom feel spooky without being frightening.
What You’ll Need
- Black marker
- White marker, if available
- Purple or orange marker
Step-by-Step
- Draw a rounded head.
- Extend the body downward.
- Create a wavy bottom edge.
- Add two large circular eyes.
- Draw a tiny oval mouth.
- Add small curved lines around the ghost.
- Place a few stars or tiny pumpkins around it.
3. Flying Halloween Bats
Bats are perfect for filling empty areas at the top of a whiteboard.
Step-by-Step
- Draw a small oval body.
- Add two pointed ears.
- Draw the left wing.
- Mirror the shape for the right wing.
- Add small zigzag edges to the wings.
- Fill the bat with black marker.
- Create two or three smaller bats nearby.


5
4. Spooky Spider Web
A spiderweb is a simple way to decorate a corner of the classroom board.
Step-by-Step
- Choose a top corner of the board.
- Draw several straight lines spreading outward from one point.
- Connect the lines using curved lines.
- Continue until the web is large enough.
- Draw a small spider in the center.
- Add a hanging thread below the spider.
5. Witch Hat
A witch hat is quick to draw and works well beside pumpkins.
Step-by-Step
- Draw a wide curved brim.
- Create a tall cone above it.
- Bend the tip slightly.
- Draw a horizontal band around the hat.
- Add a small buckle.
- Fill the hat with black or purple marker.
- Add a few stars around it.
6. Haunted House
Turn a simple house into a spooky Halloween scene.
Step-by-Step
- Draw a rectangular house.
- Add a crooked triangular roof.
- Draw a large door.
- Add two or three uneven windows.
- Draw a chimney.
- Add a crooked tree beside the house.
- Draw a moon behind the roof.
- Add bats flying around the house.
7. Halloween Candy Corner
Candy drawings can add bright colors to your whiteboard.
Step-by-Step
- Draw several wrapped candies.
- Add twisted ends.
- Create stripes, dots, or zigzag patterns.
- Draw a few candy pieces in different sizes.
- Add candy corn shapes.
- Scatter small stars around the candy.
8. Cute Black Cat
A black cat works especially well beside a pumpkin patch.
Step-by-Step
- Draw a circular head.
- Add two pointed ears.
- Draw the body.
- Add four simple legs.
- Draw a long curling tail.
- Add two bright eyes.
- Draw whiskers on both sides.
9. Halloween Pumpkin Patch
Create a whole group of pumpkins instead of drawing just one.
Step-by-Step
- Draw several pumpkins in different sizes.
- Add curved sections to each pumpkin.
- Draw stems.
- Add leaves and vines.
- Place some pumpkins behind others.
- Draw small grass lines underneath.
- Add a few fallen leaves.
10. Frankenstein Classroom Monster
A friendly Frankenstein is great for a playful classroom display.
Step-by-Step
- Draw a large square-shaped head.
- Color the face green.
- Add messy black hair.
- Draw two circular eyes.
- Add thick eyebrows.
- Draw a wide smile.
- Add two small bolts near the sides of the neck.
- Add a few stitches across the face.
11. Halloween Moon and Stars
A moon scene can become a beautiful background for your classroom board.
Step-by-Step
- Draw a large crescent moon.
- Add several small stars.
- Draw a few clouds.
- Add flying bats.
- Place a haunted house beneath the moon.
- Add pumpkins around the bottom.
12. Spooky Eyeball
A giant eyeball is simple, funny, and eye-catching.
Step-by-Step
- Draw a large oval.
- Add a smaller circular iris.
- Draw a dark pupil.
- Add red veins around the eye.
- Draw a few eyelashes.
- Add tiny stars or drops around the eyeball.

4
13. Halloween Countdown Board
Turn your whiteboard decoration into an interactive classroom activity.
What You’ll Need
- Black marker
- Orange marker
- Purple marker
- White marker
Step-by-Step
- Write “Days Until Halloween” across the top.
- Draw a large number underneath.
- Surround it with pumpkins and bats.
- Add a ghost on one side.
- Add a witch hat on the other side.
- Update the number every school day.
- Let students decorate a small section each morning.
14. Trick-or-Treat Bucket
A candy bucket can hold a fun classroom message.
Step-by-Step
- Draw a large rounded bucket.
- Add a curved handle.
- Draw a spooky or smiling face.
- Add candy sticking out from the top.
- Decorate the bucket with stars.
- Draw a few candy pieces around it.
15. Cute Halloween Monster
Create a silly monster that students can help design.
Step-by-Step
- Draw an irregular body shape.
- Add two or three eyes.
- Give the monster funny ears or horns.
- Draw a large mouth.
- Add uneven teeth.
- Give it silly hair.
- Add colorful spots and stripes.
16. Skeleton Face
A simple skull can add a classic Halloween touch.
Step-by-Step
- Draw a rounded skull shape.
- Add two large eye sockets.
- Draw a triangular nose.
- Add a row of square teeth.
- Draw a few cracks on the forehead.
- Outline the skull with black marker.
17. Witch’s Broom
A broom can be used as a decorative divider between classroom sections.
Step-by-Step
- Draw a long diagonal stick.
- Add straw-like lines at one end.
- Draw a band around the straw.
- Add a small witch hat beside it.
- Draw stars around the broom.
- Add a few curved motion lines.
18. Halloween Garland
A garland is ideal for decorating the top edge of your whiteboard.
Step-by-Step
- Draw a long curved string.
- Add small hanging shapes.
- Alternate pumpkins, ghosts, bats, and stars.
- Use different colors for each decoration.
- Add small leaves between the shapes.
19. Friendly Vampire
A cute vampire can make the classroom Halloween theme more playful.
Step-by-Step
- Draw a round face.
- Add short black hair.
- Draw two eyes.
- Add eyebrows.
- Draw two small fangs.
- Add a cape around the shoulders.
- Draw a small bow tie.
- Give the vampire a friendly smile.
20. Halloween Potion Bottle
Potion bottles are easy to personalize with different colors.
Step-by-Step
- Draw a bottle with a narrow neck.
- Add a cork or cap.
- Fill the bottle with green or purple potion.
- Draw bubbles inside.
- Add a simple decorative label.
- Draw stars and magical swirls around it.


4
21. Halloween Cupcake
A Halloween cupcake adds a cute food-themed element.
Step-by-Step
- Draw a cupcake wrapper.
- Add a large frosting swirl.
- Decorate the frosting with sprinkles.
- Add candy eyes.
- Place a tiny pumpkin or bat on top.
- Add stars around the cupcake.
22. Mummy Character
A mummy can be created almost entirely with simple lines.
Step-by-Step
- Draw a rounded body.
- Add two large eyes.
- Draw horizontal and diagonal bandage lines.
- Leave the eyes uncovered.
- Add simple arms and feet.
- Add small wrinkles to the bandages.
23. Halloween Classroom Scene
Combine several simple elements into one large display.
Step-by-Step
- Start with a large moon in the upper corner.
- Draw a haunted house underneath it.
- Add pumpkins along the bottom.
- Place ghosts around the house.
- Draw bats across the sky.
- Add a spiderweb in one corner.
- Place a black cat beside the pumpkins.
- Add stars and autumn leaves to fill small empty spaces.
24. Ultimate Halloween Teacher Whiteboard
Create one large classroom display that combines decoration with useful classroom information.
What to Include
- Halloween title
- Pumpkin
- Ghost
- Bat
- Spiderweb
- Haunted house
- Witch hat
- Black cat
- Candy
- Halloween countdown
- Daily classroom message
Step-by-Step
- Start by creating a large decorative Halloween border.
- Draw pumpkins in the bottom corners.
- Add ghosts and bats around the top.
- Draw a small haunted house on one side.
- Add a witch hat and broom on the opposite side.
- Create a central space for the day’s lesson or announcement.
- Add a Halloween countdown in one corner.
- Decorate the remaining empty areas with stars, leaves, candy, and tiny spiders.
- Use black for outlines and orange, purple, green, and red for accents.
- Keep the center area clean so the artwork doesn’t interfere with classroom information.
Tips for Creating Great Halloween Whiteboard Art
Keep the Designs Simple
Start with circles, ovals, triangles, and rectangles. Simple shapes can easily become pumpkins, ghosts, monsters, and other Halloween characters.
Use a Consistent Color Palette
Black, orange, purple, green, red, and white work especially well together.
Leave Space for Teaching
Don’t cover the entire whiteboard with decorations. Reserve a clear area for lessons, announcements, schedules, or student activities.
Make It Interactive
A Halloween countdown, daily drawing challenge, or student-designed monster can turn your decoration into a classroom activity.
Mix Cute and Spooky
For younger students, combine spooky elements with friendly faces and cheerful expressions.
Add Small Details
Stars, dots, leaves, tiny bats, candy, and spiderwebs can make a simple drawing look much more complete.

4
Conclusion
These 24 Halloween Whiteboard Ideas for Teachers make seasonal classroom decorating simple, affordable, and creative. From easy pumpkins and friendly ghosts to haunted houses, potion bottles, monsters, and interactive countdown boards, there’s an idea for almost every classroom style.
The best part is that you don’t need advanced artistic skills. Start with simple shapes, use a few Halloween colors, and add details gradually. You can also invite students to contribute their own drawings, making the whiteboard a collaborative part of your Halloween celebration.
Whether you want a quick five-minute decoration or a large Halloween scene, these ideas can help transform an ordinary classroom board into a fun and festive focal point.
FAQ
1. What are the easiest Halloween whiteboard drawings for teachers?
Pumpkins, ghosts, bats, spiderwebs, witch hats, and candy are among the easiest designs because they can be created using basic shapes.
2. What colors should I use for Halloween whiteboard art?
Black, orange, purple, green, red, and white create a classic Halloween palette. Yellow is also useful for moons and stars.
3. Can students help create Halloween whiteboard decorations?
Yes. Students can draw individual pumpkins, ghosts, bats, leaves, or monsters and add them to a larger classroom display.
4. How can I make a Halloween whiteboard interactive?
Try a Halloween countdown, daily drawing challenge, Halloween question of the day, vocabulary activity, or student-created monster board.