
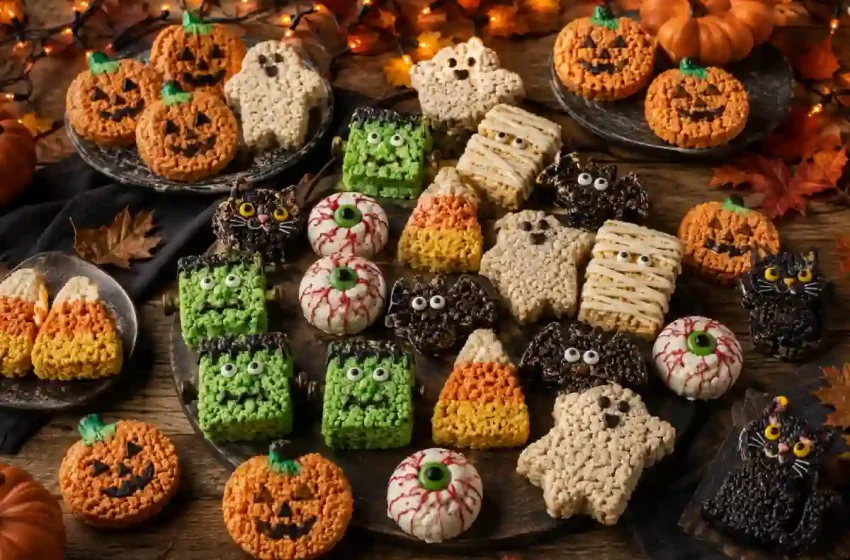
30 Halloween Rice Krispie Treats for a Sweet and Spooky Celebration
Halloween Rice Krispie treats are one of the easiest ways to add homemade fun to an October celebration. They require only a few basic ingredients, can be shaped into almost anything, and are simple enough for children to help decorate. With colorful candy melts, chocolate, sprinkles, and edible eyes, an ordinary pan of crispy cereal treats can become a collection of pumpkins, ghosts, monsters, mummies, bats, and other spooky characters.
These recipes are perfect for Halloween parties, classroom celebrations, bake sales, trick-or-treat gatherings, and family movie nights. Most can be made ahead of time and stored at room temperature, saving valuable preparation time on the day of your event.
The collection begins with one reliable base recipe, followed by 30 creative decorating ideas. Each variation makes approximately 12 treats unless otherwise noted. When using lollipop sticks, candy decorations, or other small pieces, supervise young children and remove anything that is not edible before serving.
Image 1 placement: Add the complete Halloween Rice Krispie treat assortment image here.
Basic Rice Krispie Treat Recipe
Use this base mixture for all the recipes below.
Ingredients
- 6 cups crispy rice cereal
- 10 ounces mini marshmallows
- 4 tablespoons butter
- ½ teaspoon vanilla extract
- Pinch of salt
- Cooking spray or additional butter
Instructions
- Line a 9-by-13-inch baking pan with parchment paper and lightly grease it.
- Melt the butter in a large saucepan over low heat.
- Add the marshmallows and stir continuously until completely melted.
- Remove the saucepan from the heat.
- Stir in the vanilla and salt.
- Add the cereal and gently fold until evenly coated.
- Transfer the mixture to the prepared pan.
- Press it into an even layer using a greased spatula. Avoid compressing it too firmly.
- Allow the treats to cool for approximately 30 minutes before cutting or decorating.
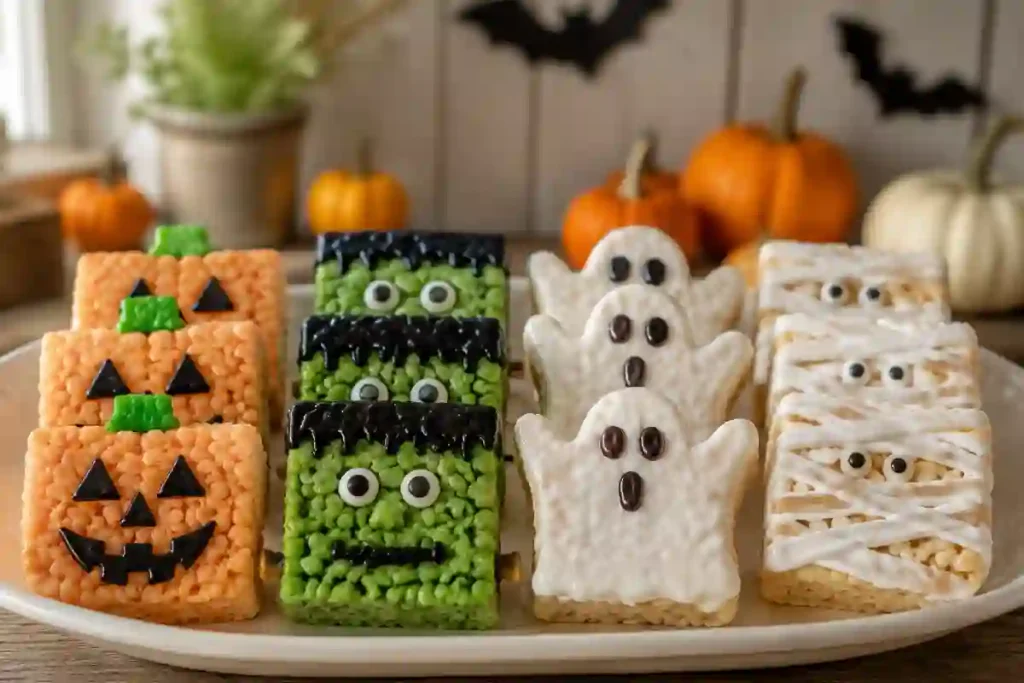
1. Jack-o’-Lantern Rice Krispie Treats
Additional Ingredients
- Orange food coloring
- Green candy melts
- Melted dark chocolate
Instructions
- Add orange food coloring to the melted marshmallow mixture.
- Prepare the treats according to the base recipe.
- Cut the cooled mixture into rectangles or pumpkin shapes.
- Pipe triangular eyes, a nose, and a jagged mouth with melted chocolate.
- Add a small amount of green candy coating at the top for the stem.
- Let the decorations set before serving.
2. Round Pumpkin Rice Krispie Treats
Additional Ingredients
- Orange food coloring
- Mini chocolate candies
- Green gummy candy or green frosting
Instructions
- Tint the marshmallow mixture orange.
- Instead of pressing it into a pan, let it cool until safe to handle.
- Grease your hands and shape portions into balls.
- Press gently around each ball to form pumpkin-like grooves.
- Place a chocolate candy or green gummy piece on top as the stem.
- Allow the pumpkins to firm before arranging them on a platter.
3. Frankenstein Rice Krispie Treats
Additional Ingredients
- Green candy melts
- Black candy melts or melted chocolate
- Edible eyes
- Chocolate candies
Instructions
- Cut the prepared cereal treats into rectangles.
- Dip the front of every rectangle into melted green candy coating.
- Add edible eyes before the coating sets.
- Pipe black chocolate across the top for Frankenstein’s hair.
- Draw a mouth and small scar.
- Attach chocolate candies to the sides to resemble neck bolts.
4. Ghost Rice Krispie Treats
Additional Ingredients
- White candy melts
- Mini chocolate chips
Instructions
- Cut the treats with a ghost-shaped cookie cutter.
- Melt the white candy coating.
- Dip each ghost into the coating or spread it across the surface.
- Place two chocolate chips on the face for eyes.
- Add another chocolate chip for the mouth.
- Let the coating harden on parchment paper.
5. Mummy Rice Krispie Treats
Additional Ingredients
- White candy melts
- Edible eyes
Instructions
- Cut the cereal treats into rectangles.
- Place them on a parchment-lined tray.
- Attach two edible eyes with melted candy coating.
- Transfer the remaining coating to a piping bag.
- Drizzle irregular lines across each treat to create mummy bandages.
- Leave part of the eyes visible and allow the coating to set.
6. Vampire Rice Krispie Treats
Additional Ingredients
- White candy melts
- Melted dark chocolate
- Red icing
- Candy fangs or white sprinkles
Instructions
- Cut the treats into rectangles or circles.
- Cover the front with white candy coating.
- Pipe dark chocolate hair along the top.
- Add chocolate eyes and a curved mouth.
- Position two white candy pieces under the mouth as fangs.
- Add a tiny line of red icing near one fang.
Image 2 placement: Add the pumpkin, Frankenstein, ghost and mummy treat image here.
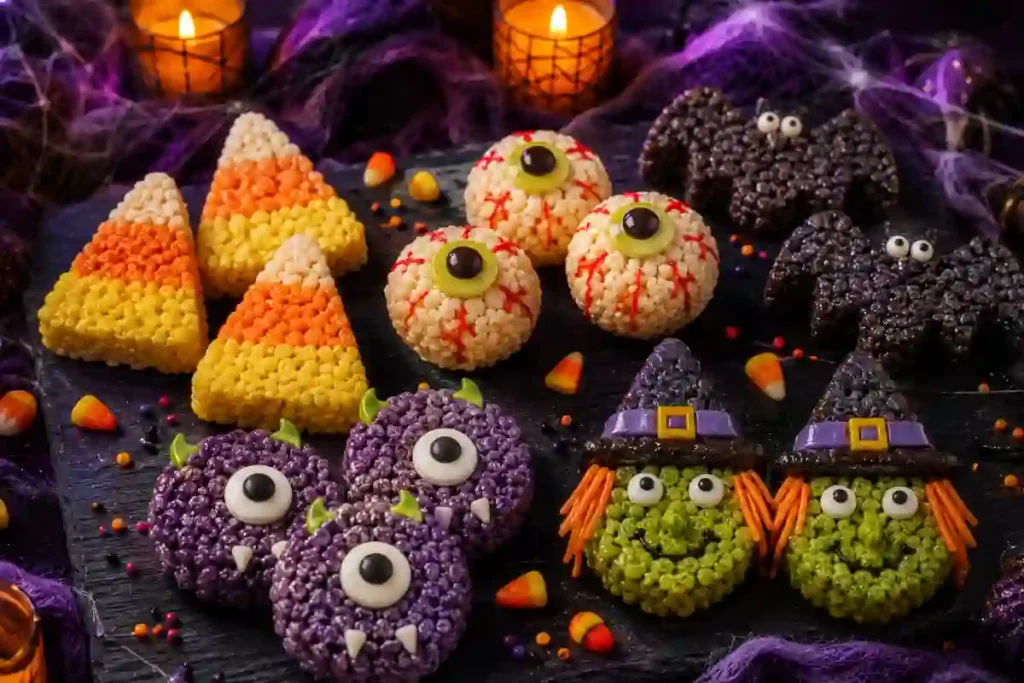
7. Candy Corn Rice Krispie Treats
Additional Ingredients
- Yellow candy melts
- Orange candy melts
- White candy melts
Instructions
- Cut the cereal mixture into large triangles.
- Dip the wide bottom section into melted yellow coating.
- Cover the middle section with orange coating.
- Dip the pointed tip into white coating.
- Place the treats on parchment paper.
- Let every layer set before serving.
8. Eyeball Rice Krispie Treats
Additional Ingredients
- White candy melts
- Green or blue candy melts
- Chocolate candies
- Red icing
Instructions
- Shape the warm cereal mixture into balls.
- Dip each ball into white candy coating.
- Add a circle of green or blue coating for the iris.
- Position a chocolate candy in the center as the pupil.
- Pipe thin red lines from the iris toward the edges.
- Allow the eyeballs to set in the refrigerator briefly.
9. Bat Rice Krispie Treats
Additional Ingredients
- Black or dark chocolate candy melts
- Edible eyes
- Black decorating icing
Instructions
- Press the cereal mixture into a slightly thinner layer than usual.
- Cut it with a bat-shaped cookie cutter.
- Dip the bats in dark candy coating.
- Add edible eyes before the coating hardens.
- Use black icing to define the wings.
- Let the bats set completely.
10. Purple Monster Treats
Additional Ingredients
- Purple candy melts
- Large edible eyes
- Halloween sprinkles
- White candies for teeth
Instructions
- Cut the cereal treats into squares or circles.
- Cover each piece with purple candy coating.
- Add one large edible eye in the center.
- Attach two small white candy teeth near the bottom.
- Decorate the edges with sprinkles.
- Leave the treats on parchment until firm.
11. Witch Face Rice Krispie Treats
Additional Ingredients
- Green candy melts
- Chocolate cookies
- Chocolate candies
- Orange icing
- Edible eyes
Instructions
- Shape the cereal mixture into flat circles.
- Cover each circle with green candy coating.
- Add edible eyes and a chocolate-candy nose.
- Draw a mouth with melted chocolate.
- Cut chocolate cookies into hat shapes and attach them at the top.
- Pipe orange icing beneath the hats for hair.
12. Black Cat Rice Krispie Treats
Additional Ingredients
- Dark chocolate
- Edible eyes
- Pink candy
- Black licorice strings or piped chocolate
Instructions
- Cut the treats into circles or cat-head shapes.
- Cover them completely with melted dark chocolate.
- Use small treat pieces or chocolate triangles for the ears.
- Attach edible eyes and a pink candy nose.
- Add whiskers with licorice strings or piped chocolate.
- Refrigerate briefly until the chocolate sets.
Image 3 placement: Add the candy corn, eyeball, bat, monster and witch image here.
13. Spiderweb Rice Krispie Treats
Additional Ingredients
- Dark chocolate
- White candy melts
- Halloween sprinkles
Instructions
- Cut the treats into circles.
- Dip their tops into melted dark chocolate.
- Pipe a small spiral of white candy coating over each circle.
- Drag a toothpick from the center toward the edge several times.
- Add sprinkles around the outer edge.
- Let the spiderweb designs set completely.
14. Rice Krispie Treat Spiders
Additional Ingredients
- Melted chocolate
- Pretzel sticks
- Edible eyes
Instructions
- Shape the cereal mixture into round balls.
- Dip or roll each ball in melted chocolate.
- Break the pretzel sticks into shorter pieces.
- Insert four pretzel legs into each side.
- Attach two edible eyes with chocolate.
- Leave the spiders on parchment paper until firm.
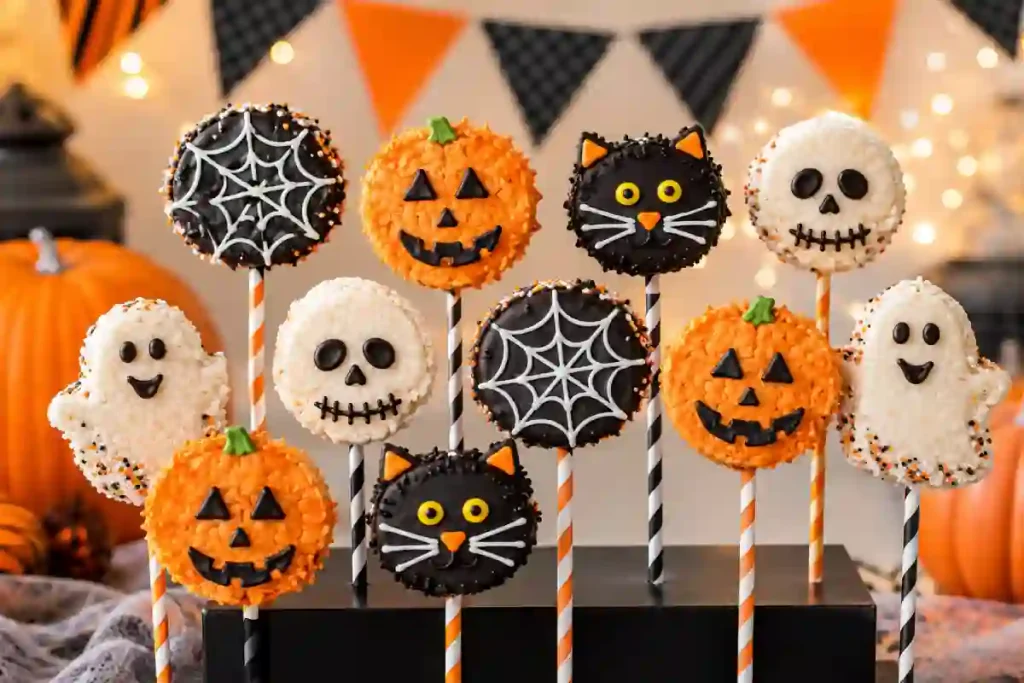
15. Halloween Treat Pops
Additional Ingredients
- Lollipop sticks
- Orange, purple, white and black candy melts
- Halloween sprinkles
Instructions
- Cut the cereal treats into circles or rectangles.
- Carefully insert one lollipop stick into each piece.
- Dip each pop partially into your chosen candy coating.
- Place the pops on parchment paper.
- Add sprinkles while the coating remains wet.
- Let them set before wrapping individually.
16. Skeleton Rice Krispie Treat Pops
Additional Ingredients
- White candy melts
- Dark chocolate
- Lollipop sticks
Instructions
- Cut the treats into circles or skull shapes.
- Insert a stick into every treat.
- Cover the treats with white candy coating.
- Pipe large dark eye sockets and a triangular nose.
- Add a stitched chocolate mouth.
- Allow the skull pops to harden upright.
17. Graveyard Rice Krispie Treats
Additional Ingredients
- Melted dark chocolate
- Chocolate sandwich-cookie crumbs
- Oval cookies
- Candy pumpkins
Instructions
- Cut the cereal treats into rectangles.
- Spread melted chocolate across the tops.
- Sprinkle crushed cookies over the chocolate to resemble soil.
- Insert an oval cookie into each treat as a tombstone.
- Add a small candy pumpkin beside the cookie.
- Let the chocolate set before moving the treats.
18. Orange-and-Black Layered Treats
Additional Ingredients
- Orange food coloring
- Black food coloring
- White candy melts
Instructions
- Prepare half a batch of orange cereal mixture.
- Press it into the bottom of a lined pan.
- Prepare another half batch and tint it black.
- Press the black mixture evenly over the orange layer.
- Let the layers cool before cutting them into squares.
- Finish with a light drizzle of white candy coating.
Image 4 placement: Add the decorated Halloween treat-pop image here.
19. Chocolate-Dipped Sprinkle Treats
Additional Ingredients
- Melted chocolate
- Orange, black and purple sprinkles
Instructions
- Cut the cereal mixture into even rectangles.
- Dip one end of each treat into melted chocolate.
- Let excess chocolate drip into the bowl.
- Cover the dipped section with Halloween sprinkles.
- Place the treats on parchment.
- Leave them at room temperature until set.
20. Cookies-and-Cream Bat Treats
Additional Ingredients
- Crushed chocolate sandwich cookies
- White candy melts
- Dark chocolate
- Edible eyes
Instructions
- Fold crushed cookies into the warm cereal mixture.
- Press the mixture into the prepared pan and let it cool.
- Cut it using a bat-shaped cutter.
- Dip the wing tips into dark chocolate.
- Attach edible eyes with white candy coating.
- Let the chocolate harden before serving.
21. S’mores Rice Krispie Treats
Additional Ingredients
- 1 cup miniature marshmallows
- ½ cup crushed graham crackers
- ½ cup chocolate chips
- Melted chocolate
Instructions
- Prepare the cereal mixture according to the base recipe.
- Fold in graham-cracker pieces and chocolate chips.
- Gently mix in the miniature marshmallows.
- Press the mixture into the lined pan.
- Drizzle melted chocolate over the top.
- Cool completely before cutting into squares.
22. Peanut Butter Monster Treats
Additional Ingredients
- ½ cup creamy peanut butter
- Green or purple candy melts
- Edible eyes
- Chocolate candies
Instructions
- Stir peanut butter into the melted marshmallow mixture.
- Add the cereal and press the mixture into the prepared pan.
- Cut the cooled treats into rectangles.
- Dip the tops into green or purple candy coating.
- Add mismatched edible eyes and chocolate-candy noses.
- Pipe silly mouths with melted chocolate.
23. Chocolate Rice Krispie Bats
Additional Ingredients
- ¼ cup cocoa powder
- Dark chocolate
- Edible eyes
Instructions
- Stir cocoa powder into the melted marshmallow mixture.
- Fold in the crispy rice cereal.
- Press the mixture into the pan and let it cool.
- Cut out bat shapes.
- Dip the edges into dark chocolate.
- Add edible eyes and allow the chocolate to set.
24. Pumpkin Spice Rice Krispie Treats
Additional Ingredients
- 1 teaspoon pumpkin pie spice
- Orange candy melts
- White chocolate
- Candy pumpkins
Instructions
- Add pumpkin pie spice to the melted marshmallow mixture.
- Fold in the cereal and press it into the pan.
- Cut the cooled treats into squares.
- Drizzle them with orange candy coating and white chocolate.
- Add one small candy pumpkin to each square.
- Allow the decorations to firm before storing.
Image 5 placement: Add the elegant Halloween Rice Krispie dessert-board image here.
25. Monster Mouth Rice Krispie Treats
Additional Ingredients
- Red candy melts
- Mini marshmallows
- Chocolate candies
Instructions
- Cut the cereal treats into rectangles.
- Slice each rectangle horizontally without cutting completely through it.
- Spread red candy coating inside the opening.
- Arrange mini marshmallows along the edges as teeth.
- Place a chocolate candy inside as the tongue.
- Let the coating set before serving.
26. One-Eyed Monster Rice Krispie Balls
Additional Ingredients
- Blue, green or purple candy melts
- Large edible eyes
- Sprinkles
- White candy pieces
Instructions
- Shape the warm cereal mixture into balls.
- Dip the balls into different colors of melted candy coating.
- Add one large edible eye to each ball.
- Position two small white candy pieces as fangs.
- Cover the tops with Halloween sprinkles.
- Let the monster balls set on parchment.
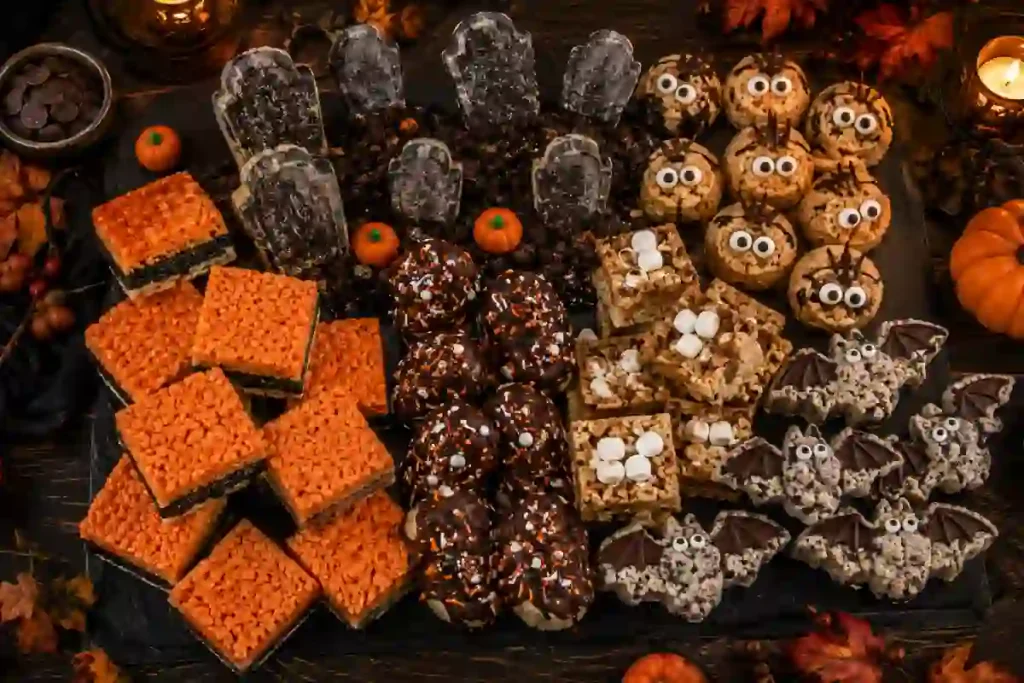
27. Creepy Crawly Worm Treats
Additional Ingredients
- Chocolate frosting
- Gummy worms
- Crushed chocolate cookies
- Green candy coating
Instructions
- Cut the cereal treats into squares.
- Spread chocolate frosting over the tops.
- Sprinkle crushed cookies over the frosting.
- Press one or two gummy worms into every square.
- Drizzle a small amount of green candy coating around the worms.
- Refrigerate briefly to firm the decorations.
28. Haunted House Rice Krispie Treats
Additional Ingredients
- Melted dark chocolate
- Candy squares
- Candy corn
- White decorating icing
Instructions
- Cut the cereal treats into rectangles with pointed tops.
- Cover the front of each house with dark chocolate.
- Add candy squares for windows.
- Position candy corn pieces along the roof.
- Pipe doors, window frames and cobwebs with white icing.
- Let the haunted houses set upright.
29. Zombie Rice Krispie Treats
Additional Ingredients
- Pale green candy melts
- Edible eyes
- Red icing
- Melted chocolate
Instructions
- Cut the cereal treats into uneven rectangles.
- Cover the fronts with pale green candy coating.
- Add edible eyes at slightly different heights.
- Pipe messy chocolate hair along the top.
- Draw crooked mouths and scars.
- Add a very small amount of red icing for a playful zombie effect.
30. Halloween Sprinkle Rice Krispie Squares
Additional Ingredients
- Orange candy melts
- Purple candy melts
- Dark chocolate
- Halloween sprinkles
Instructions
- Prepare and cool a pan of classic cereal treats.
- Cut it into equal squares.
- Drizzle orange, purple and dark chocolate coatings across the tops.
- Immediately add Halloween sprinkles.
- Leave the treats uncovered until the coating becomes firm.
- Arrange them in alternating colors on a party tray.
Tips for Perfect Halloween Rice Krispie Treats
- Use fresh marshmallows because older ones may not melt smoothly.
- Keep the heat low to prevent the treats from becoming hard.
- Grease your hands or spatula before pressing and shaping the mixture.
- Do not pack the cereal mixture too firmly into the pan.
- Let the treats cool before dipping them into candy coating.
- Dry cookie cutters lightly with cooking spray before cutting shapes.
- Melt candy coating gradually to keep it from burning.
- Add sprinkles and edible eyes before the coating hardens.
- Store finished treats in an airtight container at room temperature.
- Separate decorated layers with parchment paper to prevent sticking.
How to Store Rice Krispie Treats
Place the treats in an airtight container and keep them at room temperature for up to three days. Avoid refrigerating plain cereal treats because cold air can make them hard. Treats containing perishable fillings should be refrigerated according to the requirements of those ingredients.
You can also freeze undecorated Rice Krispie treats for up to six weeks. Wrap them individually, place them in a freezer-safe container bag, and thaw them at room temperature before decorating.
Conclusion
Halloween Rice Krispie treats are easy to prepare, endlessly customizable, and suitable for celebrations of almost any size. From classic pumpkins and ghosts to monster mouths, haunted houses, and spooky treat pops, there is a design for every Halloween party theme.
Choose a few coordinating recipes for a polished dessert table, or invite children to decorate their own treats with candy coating, sprinkles, and edible eyes. Whichever designs you make, these crunchy marshmallow treats will bring plenty of sweetness and playful Halloween spirit to your celebration.
Frequently Asked Questions
Can I make Halloween Rice Krispie treats in advance?
Yes. Most varieties can be prepared one or two days ahead. Store them in an airtight container at room temperature and add delicate decorations after the treats have completely cooled.
Why did my Rice Krispie treats become hard?
Hard treats usually result from cooking the marshmallows at too high a temperature, pressing the mixture too firmly, or using too much cereal. Melt the butter and marshmallows slowly over low heat.
How do I keep the mixture from sticking to my hands?
Lightly coat your hands with butter or cooking spray before shaping the warm mixture. You can also use a greased sheet of parchment paper to press it into the pan.
Can I use large marshmallows instead of mini marshmallows?
Yes. Use approximately 10 ounces of large marshmallows and stir them patiently because they take longer to melt.
Can I use marshmallow cream?
Yes, although the texture may be softer. One seven-ounce jar of marshmallow cream can generally replace approximately 10 ounces of marshmallows.
What is the best coating for decorated cereal treats?
Candy melts are convenient because they harden quickly and come in many colors. Melted white, milk, or dark chocolate also works well.
How do I cut clean Halloween shapes?
Allow the mixture to cool completely, lightly grease a metal cookie cutter, and press firmly. A thinner layer is easier to cut into detailed shapes.
Are these treats gluten-free?
Crispy rice cereal may contain malt flavoring derived from barley. Select certified gluten-free cereal and verify that every candy and decoration is gluten-free.
How can I make the recipes dairy-free?
Use a dairy-free butter substitute and dairy-free marshmallows, chocolate, and candy coating. Check every ingredient label carefully.
Can children help make these treats?
Children can stir cooled ingredients, cut simple shapes, attach edible eyes, and add sprinkles. Adults should handle the stove, hot marshmallow mixture, sharp utensils, and melted coatings.